Alt Text: A healthcare professional demonstrating the correct technique for responding to an infant choking victim during a BLS certification class.
Alt Text: Infographic diagram comparing BLS choking response protocols for adults, children, and infants, highlighting key differences.
Choking kills fast. A fully obstructed airway cuts oxygen to the brain in seconds, and unconsciousness can follow within a minute if nothing is done. That is why every BLS Provider curriculum covers foreign-body airway obstruction in depth, with age-specific protocols for adults, children, and infants. The technique is not the same across all three groups, and the wrong technique can cause serious injury to a small patient. This guide walks through each age-group protocol, the recognition signs, and exactly what to do if the choking victim becomes unresponsive.
How to Recognize Choking
Not every cough is choking. The first job in any suspected choking emergency is recognition. A partially obstructed airway produces forceful coughing, wheezing, or noisy breathing. A fully obstructed airway produces silence. The patient cannot speak, cough, or breathe effectively. The universal sign of choking is both hands clutched to the throat.
If the patient can still cough forcefully, encourage them to keep coughing. Do not interfere. The body’s own reflex is often stronger than any external intervention. If the cough becomes weak, silent, or if the patient cannot speak at all, the airway is fully obstructed and intervention begins immediately.
Adult Choking Protocol (Age 8 and Older)
Step 1: Confirm the Obstruction
Ask the patient if they are choking. If they nod yes and cannot speak, the airway is obstructed and you proceed. If they can speak, the airway is not fully blocked and you encourage coughing while preparing to act if it worsens.
Step 2: Stand Behind the Patient
Position yourself directly behind the patient. For a shorter rescuer helping a taller patient, a stable wide stance gives the leverage needed for effective thrusts. Wrap your arms around the patient’s waist below the rib cage.
Step 3: Deliver Abdominal Thrusts
Make a fist with one hand and place the thumb side against the patient’s abdomen just above the navel and well below the breastbone. Grasp your fist with your other hand and deliver quick, upward thrusts. Each thrust is a distinct, forceful motion, not a continuous squeeze. Continue until the object is expelled or the patient becomes unresponsive.
Step 4: Special Considerations
For pregnant patients or patients with larger body habitus where abdominal thrusts are not practical, deliver chest thrusts instead. Position your fist on the center of the breastbone and pull straight back toward yourself with each thrust.
Child Choking Protocol (Age 1 to 8)
The child protocol is nearly identical to the adult protocol, with one important adjustment. Rescuers often need to kneel down to the child’s level to deliver thrusts at the correct angle. The force applied should be appropriate for the child’s size. Full adult force on a small child risks causing rib fractures or internal injury, so the pressure is moderated while still being forceful enough to dislodge the obstruction.
Key Differences From Adult
Kneel behind the child so your arms can wrap around at the correct height. Use less force than you would on an adult but enough to be effective. Stop and check the mouth after each thrust only if the object becomes visible. Do not do blind finger sweeps because they can push the object deeper into the airway.
Infant Choking Protocol (Under Age 1)
Infant choking response is fundamentally different from adult and child techniques. Abdominal thrusts are never used on infants because the liver sits high and unprotected under the rib cage and can be seriously injured by that pressure. The infant protocol uses back slaps and chest thrusts in alternating sets.
Step 1: Position the Infant
Support the infant face-down along your forearm with the head lower than the body. Rest your forearm on your thigh for stability. Support the infant’s jaw with your hand without pressing on the throat.
Step 2: Deliver Five Back Slaps
Using the heel of your free hand, deliver five firm back slaps between the infant’s shoulder blades. Each slap is a distinct, forceful motion aimed at expelling the obstruction through the force of gravity and the back blow combined.
Step 3: Turn and Deliver Five Chest Thrusts
If the obstruction has not cleared, turn the infant face-up along your other forearm, again with the head lower than the body. Place two fingers on the breastbone just below the nipple line. Deliver five chest thrusts that are distinct, downward, and about 1.5 inches deep.
Step 4: Repeat Until Cleared or Unresponsive
Alternate between five back slaps and five chest thrusts until the object is expelled or the infant becomes unresponsive. Check the mouth between sets only if an object becomes visible. Never blind sweep an infant’s mouth.
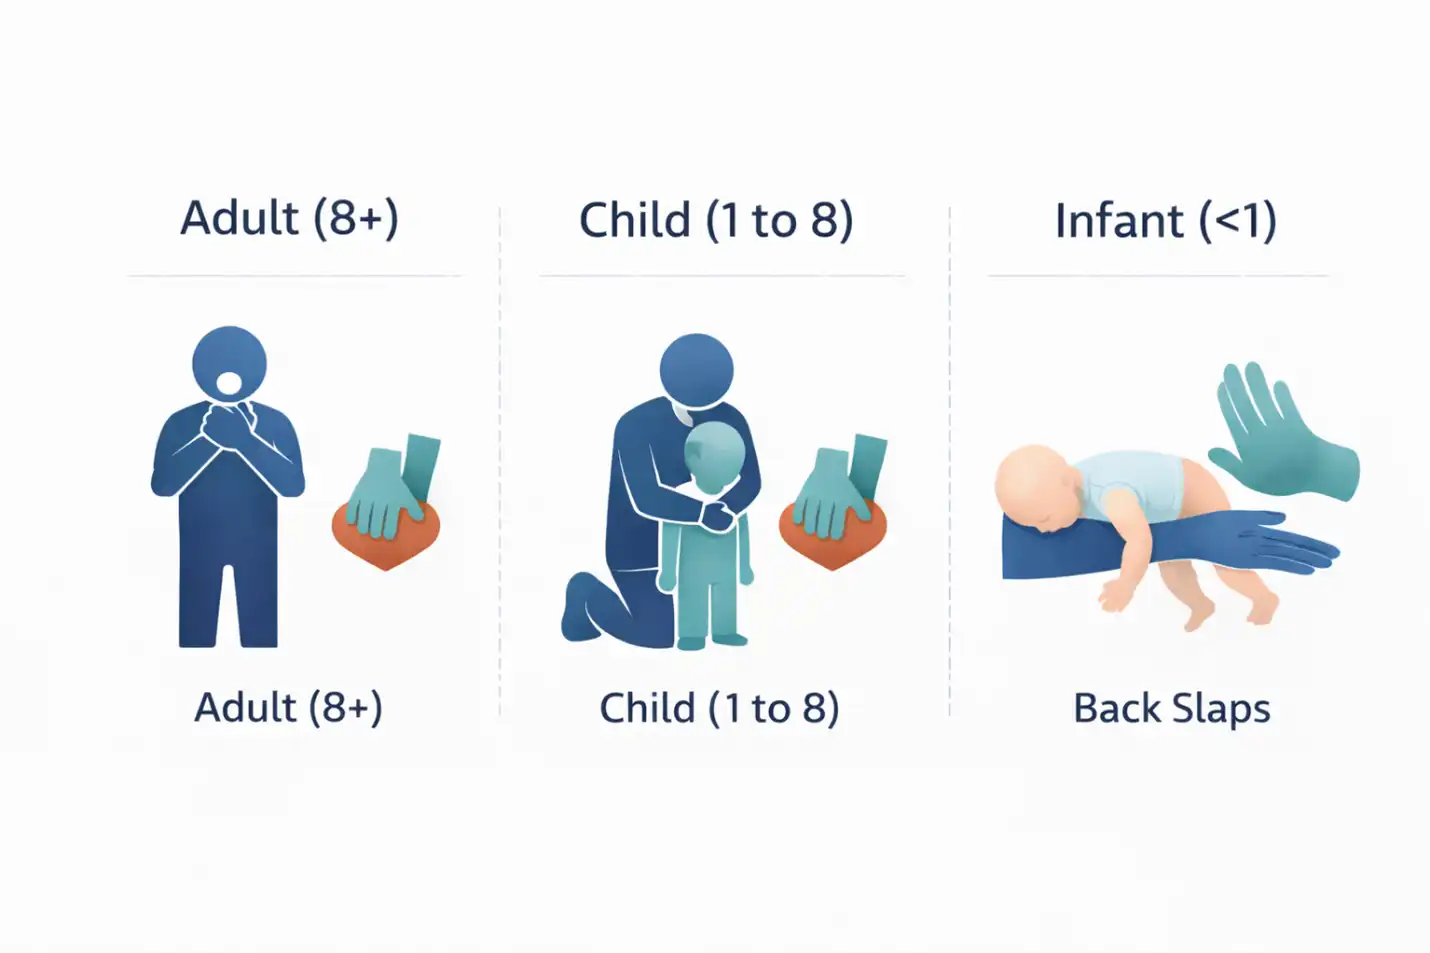
Choking Protocol Comparison by Age
Here is the clearest side-by-side summary of the protocol differences.
| Factor | Adult (8+) | Child (1 to 8) | Infant (under 1) |
| Primary Technique | Abdominal thrusts | Abdominal thrusts | Back slaps + chest thrusts |
| Force Level | Full force | Moderated force | Controlled, small patient |
| Position | Stand behind | Kneel behind | On rescuer’s forearm |
| Hand Placement | Above navel | Above navel | Between shoulder blades, then breastbone |
| Blind Sweep? | Never | Never | Never |
What to Do If the Victim Becomes Unresponsive
When a choking victim becomes unresponsive, the protocol shifts immediately from choking relief to CPR. The reason is that chest compressions generate higher intrathoracic pressures than abdominal thrusts and are more likely to expel the obstruction from a collapsed patient.
For Adults and Children
Lower the patient to the ground gently. Call for help or activate emergency services if you have not already. Begin chest compressions at the correct rate and depth for the age group. Before each set of rescue breaths, check the mouth and remove any visible object. Never blind sweep. If you see the object, remove it with a finger. If you do not see it, continue with ventilations and more compressions.
For Infants
The same shift applies. Place the infant on a firm, flat surface. Begin infant CPR at the correct compression rate and depth. Check the mouth before each set of breaths and remove any visible object. Continue until the obstruction is cleared, the infant recovers, or advanced providers take over.
For the full CPR sequence across age groups, review our what to expect in a BLS class guide.
After the Obstruction Clears
Even when the airway clears successfully, every choking victim should be evaluated by a medical professional. Abdominal thrusts can cause internal injury that is not immediately obvious. Chest thrusts can fracture ribs. Small pieces of the obstruction may still be lodged in the lower airway. A brief emergency department visit rules out complications and gives the patient peace of mind.
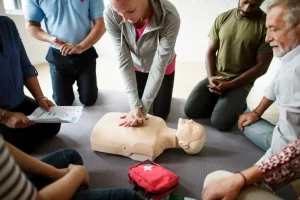
Learn These Skills Hands On in BLS Class
Reading the protocols is a start. Performing them under pressure requires hands-on practice with manikins, instructor coaching, and repetition until the technique is automatic. Our Stoughton BLS Provider classes cover all three age-group protocols with practice time for each. Reserve your seat in the next BLS class.
For the adjacent clinical skill of AED deployment during cardiac arrest, read our AED use step-by-step guide. For the full enrollment walkthrough, see the step-by-step BLS certification guide for Massachusetts.